


10 Steps to a Fresh Clutch
A do-it-yourself guide to replacing a motorcycle clutch
Although we use it every time we ride, most riders rarely think about their bike’s clutch. Even though we may do the right thing by adjusting and lubricating the cable occasionally, or perhaps flushing the hydraulic fluid according to the factory maintenance schedule, do we ever consciously think about the daily abuses our clutch undergoes each time we pull away from a stop? Never. That is, until something starts to go wrong.
The reality is that your bike’s clutch wears every time the plates slip over each other as the clutch is engaged or disengaged. An aggressive launch increases the strain exponentially. Consequently, at the first sign of clutch failure, you should replace it. Don’t wait until your clutch fails completely, stranding you miles from home and possibly taking more expensive engine components with it. The signs of clutch wear include: slipping under power, loss of clutch “feel,” grabbiness, or some other marked change in clutch function. While you might be able to get away with only replacing the clutch’s fiber plates, riders who want to be certain their bike is performing at its very best, however, will replace all the plates and springs at the same time. Motorcycle clutches are typically the multi-plate type, but a few BMWs and Moto Guzzis have used single-plate clutches. Wet-type clutches, which reside in an oil bath, are most often used in motorcycles; dry clutches are less common.
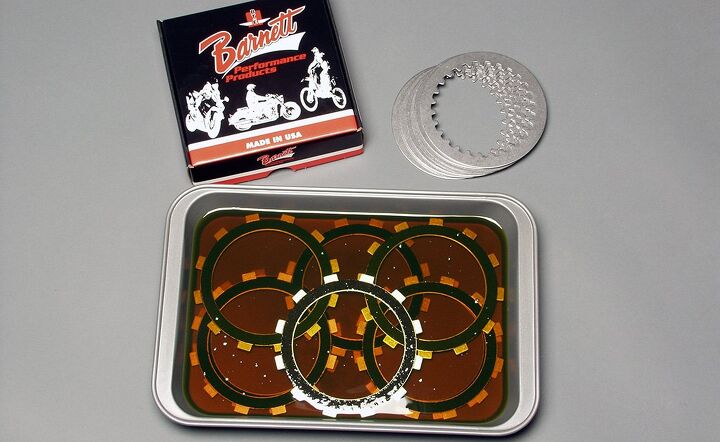
10. Order the Right Parts
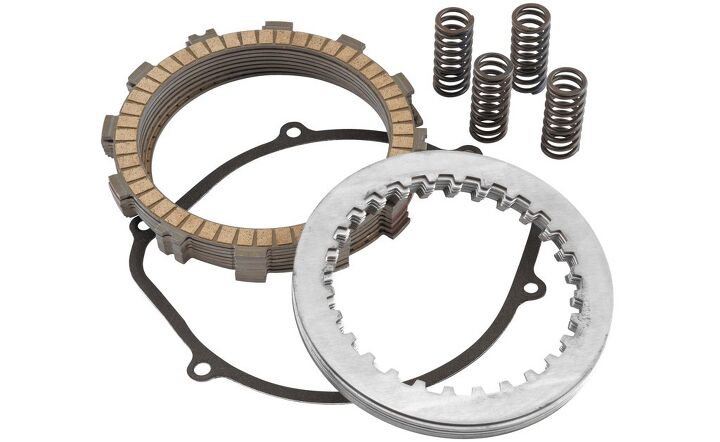
A bike’s clutch pack is made of two different types of plates: the fiber/friction plates and the metal plates that separate them. When you order replacement fiber plates, you may be faced with the choice of either carbon fiber or Kevlar friction material. Typically, carbon fiber plates can handle more abuse, which makes them ideal for racing situations. However, that additional strength often comes at the expense of being slightly more abrasive to the steel plates, wearing them out quicker. So, companies, like Barnett Tool and Engineering, offer the less abrasive (and slightly less durable) Kevlar plates for street riders – since they tend to both abuse and replace clutches less frequently. When you order your parts, be sure to include a clutch cover gasket.
9. Peel Away the Layers
Unless the clutch failed completely, draining the oil isn’t absolutely necessary. However, replacing the clutch pack is a great time to change the oil, too. Otherwise, begin by leaning the bike away from the clutch side so that the oil won’t leak out when you take the clutch cover off. Next, using the appropriate-sized socket, loosen all of the clutch cover bolts in a crisscross pattern. Pick a point on the cover (mark it with a grease pencil if you’re forgetful), remove the bolts one at a time in either direction, and place them in order on a clean shop rag. You may find that the bolts vary in length, so maintaining their orientation might be vital on reassembly. Being organized with your parts as you remove them will keep you from making a mistake on reassembly.
Position a pan to catch any oil that may leak out when you remove the cover. Tap the cover along its edge with a rubber mallet or dead blow hammer to loosen the gasket sealer. Pull the cover free. If the cover still won’t pull free, locate the pry tabs on the clutch cover and gently pry the cover free of the case with a screwdriver or pry bar.
8. Remove the Clutch Pressure Plate
Remove the clutch pressure plate bolts in a crisscross pattern. (Take note of any alignment marks on the clutch pressure plate and basket that may need to be matched on reassembly.) Remove the pressure plate and set it aside. The throw-out bearing in the center of the basket may fall out as the pressure plate is removed. If it does, check for alignment marks and place it back into position.
7. Remove Clutch Plates
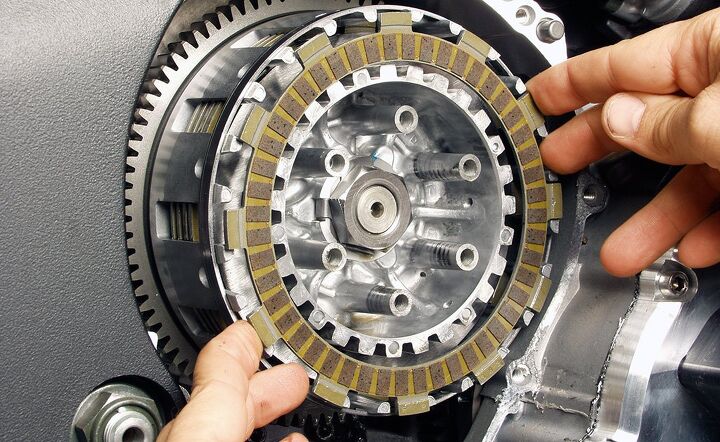
Using the tips of your fingers or a pair of curved picks, remove the clutch plates one at a time and stack them in exactly the same order. Zip-tying them together will make it easier to match the plate order during installation. Incorrectly stacked plates can cause premature clutch failure. You may also need to remove an inner steel plate that is secured with a retainer ring on some bikes. Since this plate is usually thicker than the other steel plates, set it aside to avoid mixing the plates.
6. Check for Wear
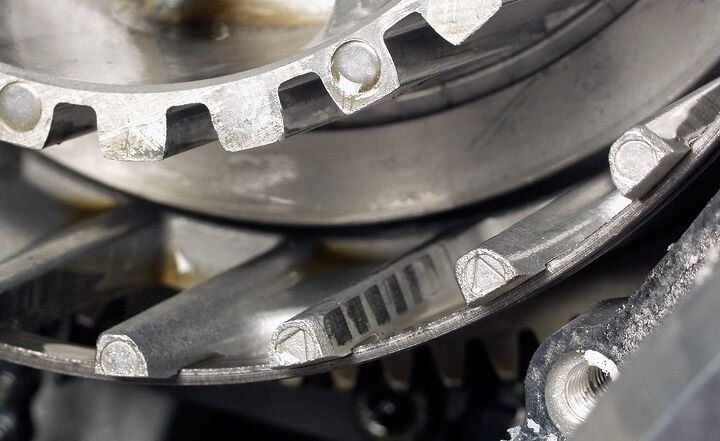
While the clutch is apart, inspect the clutch basket’s inner and outer hubs for wear. Slight polishing of the hub is normal. However, if any notches or grooves are visible, the basket may need to be replaced. Installing a new clutch into a worn basket may result in abrupt clutch engagement or clutch chatter.
5. Check the Steel Plates
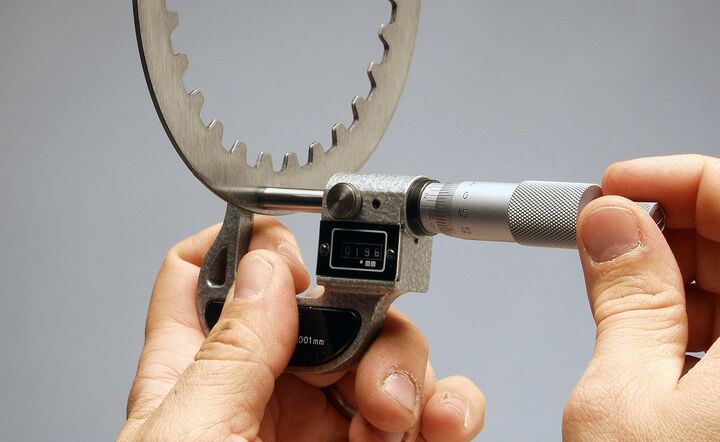
If you don’t plan on replacing the steel plates along with the fiber ones, check them for any signs of wear, such as discoloration or scoring. Measure the steel plates’ thickness to make sure the plates are within the manufacturer’s recommended tolerances. Place the plates on a known flat surface (plate glass works well) to make sure the plates are not warped. If any of the plates do not lay flush to the surface or can be rocked in any direction, replace the plates as a set. Or you could save yourself this effort and simply buy the steel plates with the fiber ones.
4. A Quick Bath
Before assembling the new clutch pack, soak the fiber plates in fresh oil for about five to ten minutes. When sliding the plates into the clutch basket, be sure to arrange fiber and steel plates in exactly the same order as the old clutch pack. (This is why zip-tying the old pack together is a good idea.) If you are unsure, the innermost and outermost plates are usually fiber. If your bike’s innermost steel plate is of a special thickness, as with the R6 featured in the photos, or requires a retaining ring, make sure that you install the correct plate. Also, some OE replacement plates may have color coding to specify the order. Consult your factory service manual.
The steel plates usually have one rounded edge and one sharp edge as a result of the stamping process that is used to manufacture them. Some mechanics say to make sure the steel plates are installed with the sharp edge facing the pressure plate or excessive outer hub wear may result. Barnett says that all the steel plates should be installed the same way and that it does not matter if the sharp edges face in or out. In fact, the company employs a proprietary de-burring of the steel plates, which it claims makes the whole “sharp edge” issue a moot point.
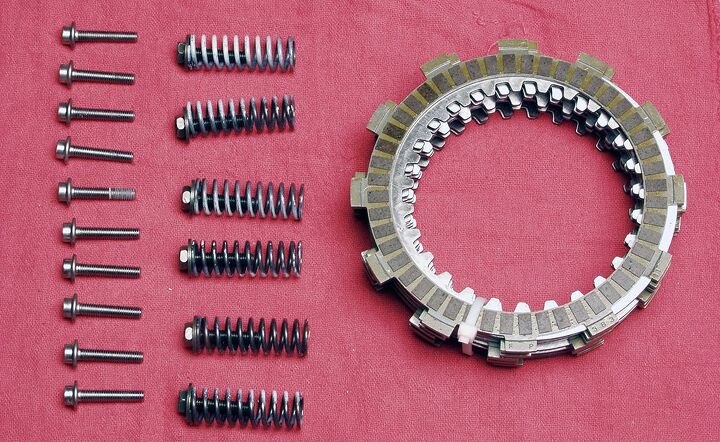
3. A Choice of Springs
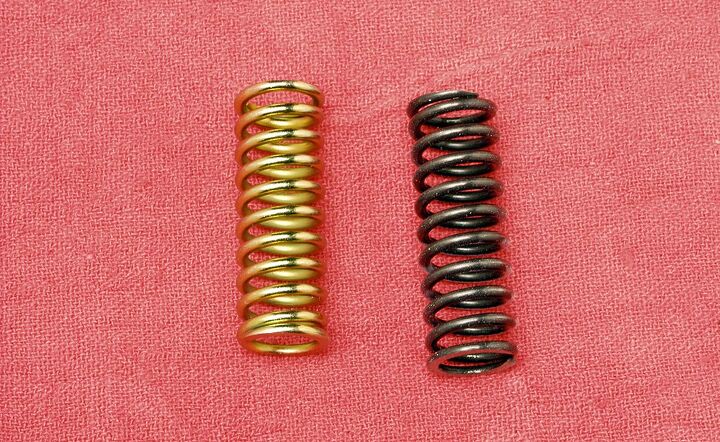
Although the OE springs may show no signs of wear and exceed the minimum length specifications, choosing to replace them with factory or aftermarket springs is cheap insurance that the plate gets properly held in place. The Barnett spring (shown left above) is approximately 10–15 percent stiffer and will require a slightly firmer pull at the lever, the company says that the additional tension provided by the springs helps make engagement of the carbon fiber or Kevlar plates more progressive. If you find the increased lever effort objectionable, you can always tune the force by using a mixture of the aftermarket and stock springs — just make sure that you install matching pairs on opposite sides of the pressure plate.
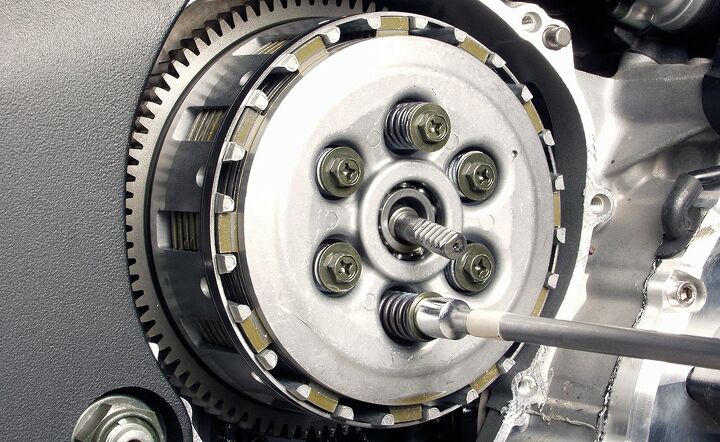
2. Reinstall Pressure Plate
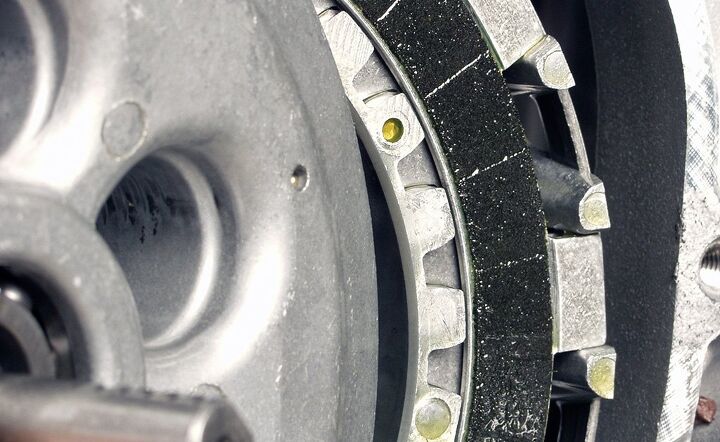
Before you reinstall the pressure plate, clean any surface rust or corrosion off the clutch pushrod to guarantee smooth clutch actuation. A thin film of grease between the pushrod and throw-out bearing will help things work more smoothly. Place the pressure plate over the clutch pack. Remember to match up any alignment marks on the clutch plate and basket (shown above). Install the springs into the pressure plate and screw the bolts in until snug. Be sure to install the springs and bolts in a crisscross pattern for even pressure on the plate. Using a torque wrench, tighten the bolts – again in a crisscross pattern – to the manufacturer’s specified torque.
1. Enjoy Your New Clutch

To remount the clutch cover, apply a thin coat of gasket sealant to both gasket mounting surfaces. A pliable, non-hardening sealant works best. If you are unsure of where to apply the sealant, look at the shape of the gasket itself. After allowing the sealant to skin over for a couple minutes, place the new gasket in position on the engine case. (Remember, the money you save by reusing the old gasket will seem inconsequential if you have to remove the cover to fix a leak.) While you’re waiting on the sealant, you can install the dowel pins (if any) in the case. The sealant should hold the gasket in position. Reinstall the cover bolts in the same order that they were removed, but do not tighten more than finger tight. Once all the bolts are installed, torque them to the factory specified setting in a crisscross pattern.
Let the bike sit for a half-hour or so to allow the gasket sealant to set before taking your bike out for a ride. Your new clutch will most likely engage in a slightly different lever position, and you may need to adjust the clutch cable freeplay. Hopefully, you’ll also notice how much more positively it engages when compared to the tired old clutch you removed.

Like most of the best happenings in his life, Evans stumbled into his motojournalism career. While on his way to a planned life in academia, he applied for a job at a motorcycle magazine, thinking he’d get the opportunity to write some freelance articles. Instead, he was offered a full-time job in which he discovered he could actually get paid to ride other people’s motorcycles – and he’s never looked back. Over the 25 years he’s been in the motorcycle industry, Evans has written two books, 101 Sportbike Performance Projects and How to Modify Your Metric Cruiser, and has ridden just about every production motorcycle manufactured. Evans has a deep love of motorcycles and believes they are a force for good in the world.
More by Evans Brasfield


Comments
Join the conversation
Good article. Hopefully more of these in the future. Next ones could be: How to check and adjust valve clearance. How to install steel brake lines.
Question:
Before carbon fiber or Kevlar, what was the material for friction plates?
Roll the clutch pushrod on a sheet of plate-glass. If it is perfectly straight, it will roll very smoothly. If it is even slightly bowed it will wobble along, and then it's best to get a new one, as it is near-impossible to bend it straight, and a bowed pushrod wrecks the smooth action of any clutch.