


How and When to Swap Motorcycle Brake Pads
Disc brakes: Ya gotta love ’em. Here’s a general primer on how to assess and change your pads. So you can love ‘em even more.
Checking the condition of your disc-brake pads should be a regular part of servicing your bike. For example, when you check tire pressures, oil level, or change the oil and filter, also check all brake pads for wear. Another opportunity to check them is when you’re washing, drying, and polishing your bike. Quite seriously, we’ve found loose and broken spokes, damaged tire tread, missing cotter pins and circlips, and other concerning factors simply because we had hands on the bike while cleaning it.
And not to sound like a broken record (or today’s equivalent, a glitching Spotify?), but the owner’s or service manual for your bike should provide details on checking pad thickness, along with instructions for changing them. So, what follows is a general guide, not a tutorial.
Motorcycle.com thanks Yamaha for sponsoring this new rider series.
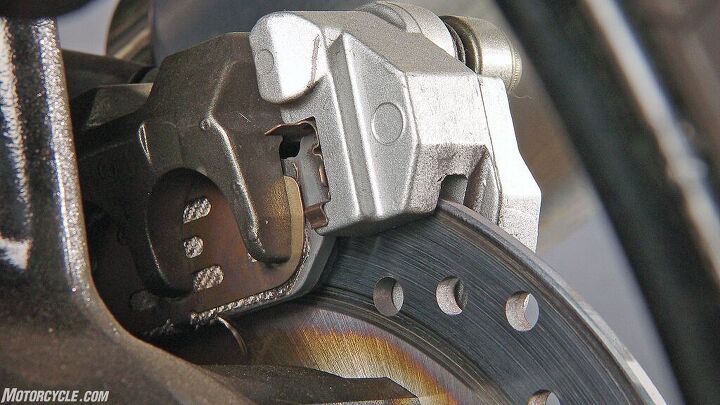
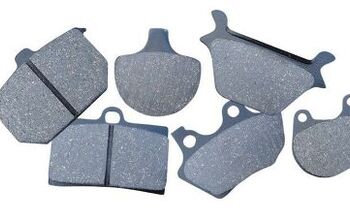
Measuring the Pads
By examining the brake pads in the caliper, you may be able to visually gauge – or measure with a ruler or caliper, if possible – the remaining pad thickness. Unless you’re a hardcore track guy (or gal), pads can last thousands of miles on a motorcycle – especially the rear pads – so they won’t require frequent replacement. Your manual may well differ, but as a matter of opinion, changing your pads when there’s 3 mm of thickness remaining is wise. Just remember, what you see or gauge at the edge of the pad may not be its uniform thickness. Depending on the caliper design, pads can wear more on one side– than the other.
Oil and Brakes Don’t Mix
A common cause – in our experience, anyway – of brake malfunction can be suspension “fluid” (it’s a type of hydraulic oil, actually) leaking from the fork seals and dripping onto the brake caliper, and from there finding its way via capillary action onto the brake pads. When this happens, it’s best to undertake a 2-part repair process: 1) Remove the fork and have the seals replaced – or replace them yourself if qualified; and 2) Remove and replace the brake pads, while also thoroughly cleaning the caliper and brake rotor(s). There’s no point installing new pads into an oily environment, or in proximity of a component that will keep leaking.
Trust Your Senses
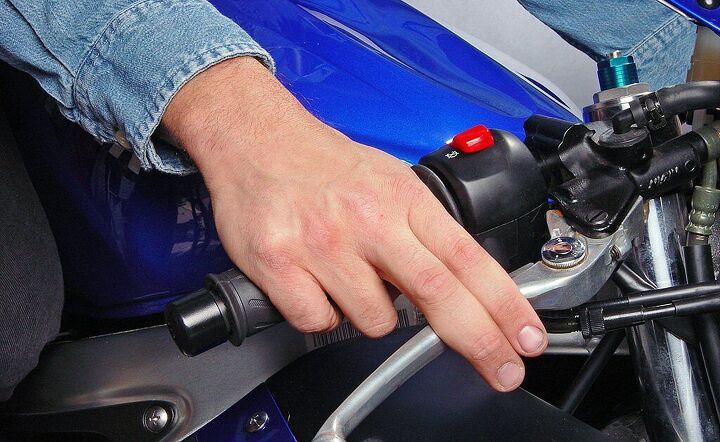
By the way, note the feel and sound when the brake lever is applied. Disc brakes have a feel when in use, but it’s usually smooth. Period. There’s no reason why disc brake operation should be noisy, feel gravelly, or be ineffective, except perhaps – just perhaps – in the immediate moments after crossing a deep stream or pond, or dashing through deep sand. If the brakes make noise or feel odd, investigate!
Getting It Done
Swapping out motorcycle brake pads is easy. That is, if you’re a competent mechanic, have previous experience at the job, have the correct tools and supplies on hand – and understand the motorcycle in question. Because Motorcycle.com has no idea whether the person reading this (that would be you) owns a 1974 Yamaha RD350 or a 2023 R1, there’s no way – short of writing a guidebook longer than Atlas Shrugged – that we can relate exactly how to proceed for every disc-brake bike.
Relax, It’s Simple
Manufacturers generally make brake-pad removal simple, easy, and foolproof. That’s because shop time costs money, and no customer will be happy to hear that their pad replacement at Sylvester’s Super Cycle Center costs more than a new clutch for a Lamborghini.
In the olden days, pads free floated in the caliper and were retained by cotter pins, or sometimes by the caliper casting itself. Techniques for pad swaps varied, but in general, only simple hand tools were required to change them. Today, brake pads are held in position by special threaded pins – essentially, long locating bolts that keep the pads captive no matter what.
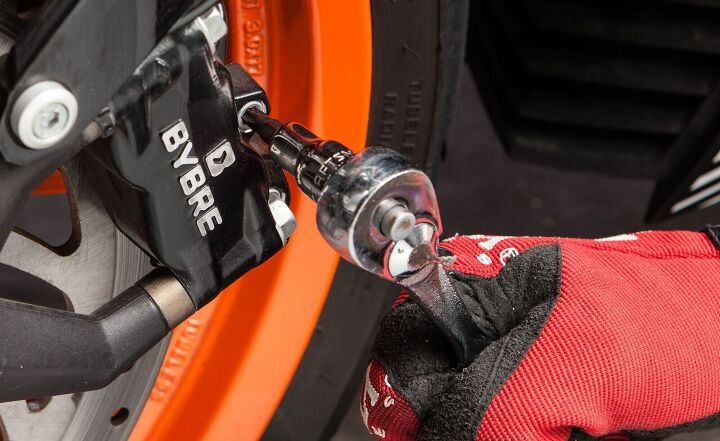
A typical modern pad replacement process follows. (Helpful tip: Take photos before every step of your brake pad swap; this gives you a quick reference of how the brake and pad assembly goes together.)
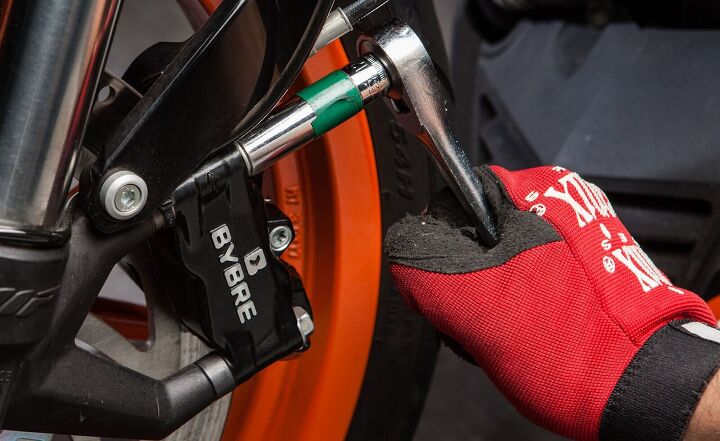
- Unbolt the caliper from the fork leg or stanchion.
- Lever the left and right brake pads apart slightly – this retracts the brake-caliper pistons (“pucks”) into the caliper bores, which will allow the replacement – i.e., thicker – new pads to fit.
- Unscrew and remove the locating pins (they may be found under a pair of threaded safety covers).
- Pull the pads from the caliper. Sometimes, spring-steel clips are integrated into the caliper (behind the pads) to eliminate chattering.
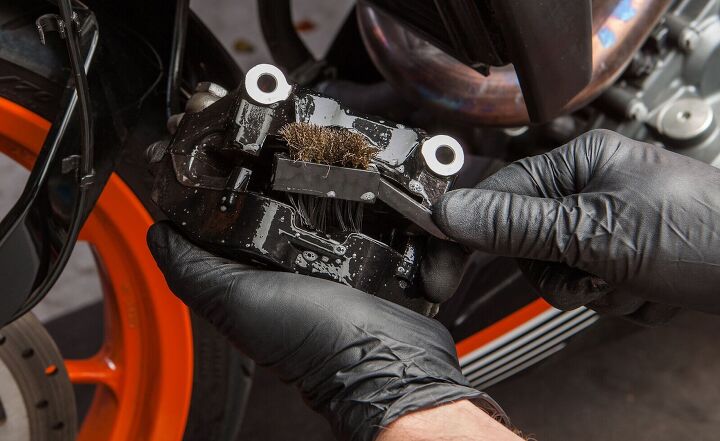
- Clean the inside of the caliper and rotor of road grit, brake dust, etc. with an aerosol brake cleaner. Place a pan under the brake assembly to catch runoff, which will be dirty, and be sure to protect your hands and eyes from splatter.
- Install new pads and pins in the opposite order and tighten fasteners to factory specs.
Finishing Up
Congratulations on getting this far. One of the final steps is to gently, slowly, activate the brake lever several times (6-8 might be a good round number) to move the pucks and new pads toward the rotors. Don’t press the lever all the way initially; instead, do it in “half” presses. This way, the piston in the master cylinder will operate normally, instead of at the end of the stroke, where oxidation, grit, etc. may exist. It’s a small tip that may help prevent leaks at the master cylinder, especially on older machines.
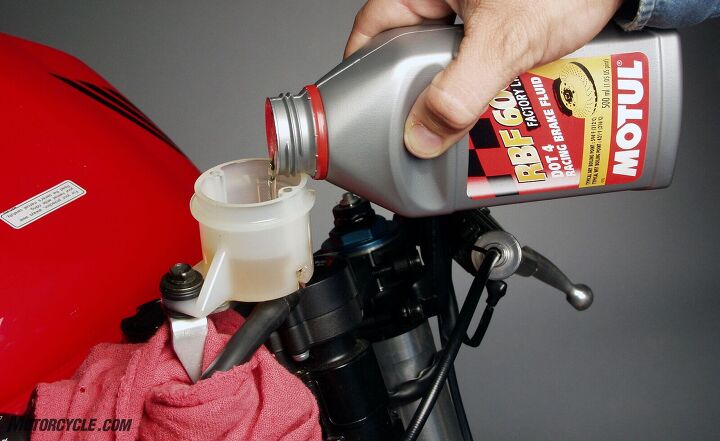
Lastly, check that the fluid level in the master cylinder reservoir is correct. (The level can increase, since pushing the pucks back in the caliper bores will push fluid in the lines up to the reservoir.) It’s worth noting that changing the fluid while you’re changing pads would be a great idea – but that’s a story for another day. As always, conduct your typical outstanding work-area cleanup, double- and triple-check that the brake(s) operate properly. On your first ride, don’t hammer your new brakes. Instead, be sure to follow your brake pad manufacturer’s bedding in process to build up to the maximum power of your brakes. You’re done!
Become a Motorcycle.com insider. Get the latest motorcycle news first by subscribing to our newsletter here.

John L. Stein brings 30 years of both automotive and motorcycle experience, having written for AutoWeek, Car and Driver, Motor Trend, Sports Car International, Chevy Outdoors, Truck Trend, Cycle World, Motorcyclist, Adventure Travel, and Men’s Journal, just to name a few. His articles have been published in the US, England, Japan, Australia and France. His technical knowledge combined with his ability to understand and effectively communicate what a motorcycle is doing underneath him is an invaluable resource to the Motorcycle.com team.
More by John L. Stein


Comments
Join the conversation
And if you need to flush the brake system, there is no reason that you need to bleed the air out of the system if air doesn't get into it. I drain the brake fluid reservoir till it is nearly empty, blot out the rest of the brake fluid, wipe the brake fluid reservoir with a clean rag that is dampened with isopropyl alcohol and then add fresh brake fluid and open a bleed screw and pump the new fluid through.
Brakes? Real men don't need brakes.